
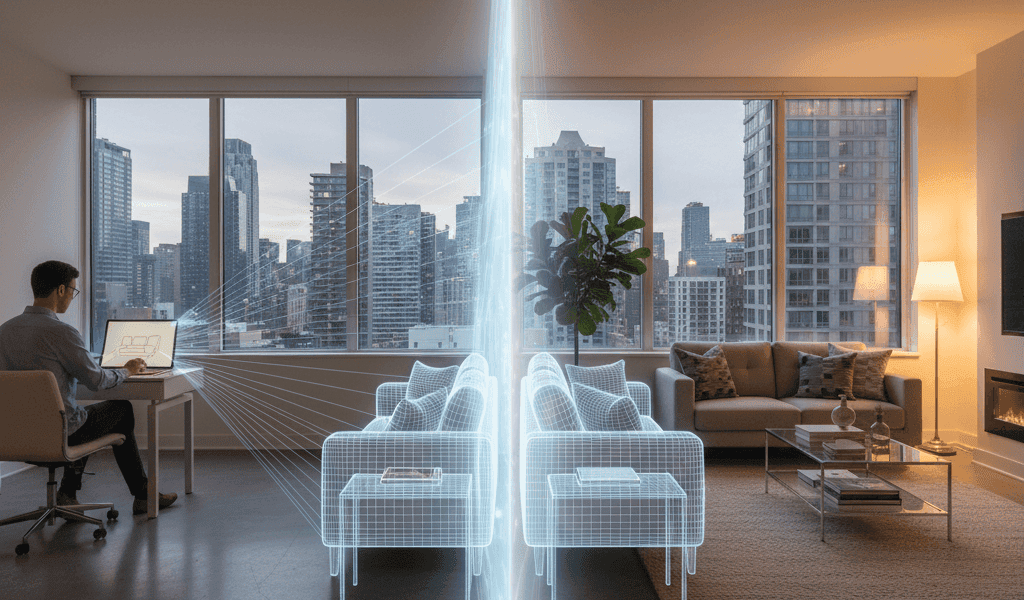

Virtual staging has become a favorite method for real estate professionals who want to present empty or dated spaces in a more appealing way. It replaces or overlays furniture and decor on photos so potential buyers can visualize a room without the cost and hassle of physical staging. If you are curious about how virtual staging tools work and what lies behind the images that sell properties faster and for higher prices this article will walk you through the mechanics in a practical way.
This guide covers the core building blocks of virtual staging tools the user workflow common file formats and what to watch for when choosing a platform. Expect hands on tips examples of typical outputs and quick checks you can run before you list your property online. Wherever possible I focus on clear steps you can apply immediately so you feel confident working with these solutions.
How Virtual Staging Tools Work from Photo to Finished Image
The simplest view of a virtual staging tool is that it is a photo editor with a specialized library and a set of rules for placing items. The process starts with a base photograph and ends with a polished image ready for marketing. Along the way the software analyzes perspective lighting and room geometry then places items with scale and shadow that match the scene. The result looks natural when executed well.
Core Components Inside Virtual Staging Tools
Most virtual staging systems combine a few essential components that handle specific tasks. Understanding these parts helps you assess features and predict output quality.
Image analysis engine
This module examines the input photo and extracts critical information such as vanishing points floor lines wall planes and light direction. The engine creates a virtual scene map so placed furniture sits on the floor and aligns with walls. Better analysis leads to fewer manual corrections later.
Object library and placement rules
The object library contains pre modeled furniture and decor items with metadata for scale orientation and material properties. Placement rules control how these objects snap to the scene map and how shadows and reflections are created. Libraries vary by style and price point so check sample renders to match your target market.
Common Workflow when Using Virtual Staging Tools
Knowing the typical workflow helps you prepare photos that yield better outcomes. Below are the steps most staging platforms follow and practical tips at each stage.
Step 1 prepare the photograph
Take a straight on photo that captures key room elements such as window openings and doorways. Avoid extreme angles and lens distortion. If possible use a tripod and natural light. A clean clutter free room reduces the need for cleanup and speeds the process.
Step 2 run the analysis and choose a layout
Upload your photo and let the tool map the space. Choose a furniture layout that matches the room function. Most tools offer living dining bedroom and office presets. If the room is nonstandard choose a flexible layout and be ready to nudge items slightly for proper alignment.
Step 3 review and edit
Inspect shadow placement scale and wall coverage. Good shadows anchor items to the floor and soft edge blending reduces the cut and paste effect. If an item overlaps a window or appears to float use the tool editor to move it or adjust depth settings.
Key Algorithms and How They Affect Results
Several algorithm families power the most convincing virtual staging results. Each has tradeoffs so knowing what they do will help you choose the right solution for your needs.
- Perspective correction algorithms detect vanishing points and apply geometric transforms so furniture lines match the photo.
- Lighting estimation predicts the dominant light source and intensity to create shadows and highlights that match the room.
- Depth estimation builds a rough depth map so objects nearer the camera are rendered with different blur or occlusion than items farther back.
- Neural rendering models can produce realistic textures and mixes of objects but may require more compute and human review for accuracy.
Tools that combine geometric rules with neural rendering generally produce the most natural looking images. Purely manual systems require more user skill but give complete control over every element.
File Formats Output Types and Resolution Considerations
Most virtual staging platforms accept JPEG PNG and sometimes TIFF for higher fidelity. Output is commonly JPEG for web use and PNG for assets that need transparent backgrounds. Resolution choices impact both upload times and final quality so balance convenience with clarity.
- For online listings choose an output at or above 1500 pixels on the long edge to keep details crisp.
- If you plan prints or large banners request high resolution or vector based assets where available.
- Keep an original unedited photo in case you need to re-run staging with different items.
Compression artifacts can betray the staging if the preview version is too small. Always review the full size output before you publish.
Practical Tips for More Convincing Staged Photos
Small adjustments often produce the largest improvements. Use these practical tips when preparing photos or reviewing edits.
- Match the style of the furniture to the property. Modern minimal pieces suit new builds while traditional items work better in older homes.
- Keep scale realistic. A sofa that is too large or too small is the quickest giveaway that an image has been staged.
- Mind reflections and windows. If a staged piece blocks a window the editor should project consistent lighting through glass or add transparent elements as needed.
- Use neutral color palettes for wide appeal. Bold patterns can distract from the room size and layout.
- Request a second opinion. What looks believable to one person may look off to another.
How to Choose a Virtual Staging Tool that Fits Your Needs
When comparing vendors look for sample galleries user controls and turnaround times. Pricing models vary by image subscription or pay per image so estimate your monthly needs before committing. Customer support options are worth checking if you expect to stage many listings or need custom furniture sets.
For an up to date roundup of platforms features and price ranges you can compare options and find links to trials as you can read here which can save time in your evaluation.
Common Pitfalls and How to Avoid Them
Even good virtual staging can result in awkward photos if you do not watch for certain problems. Here are recurring issues and simple checks that prevent them.
- Floating furniture which indicates poor floor mapping. Check shadow anchors and floor contact points.
- Repeated patterns that look tiled. Use higher quality textures or swap items for variety.
- Busy compositions that hide room flow. Remove unnecessary decor and highlight walkways.
- Incorrect scale in doorways and windows. Measure a visible element and compare it to the virtual item scale.
As a final check view the staged image on mobile and desktop. Many buyers browse listings on phones and some artifacts only become obvious at smaller sizes.
Case Examples that Show What to Expect
Example one is a small urban studio. The owner provided a single straight on photo with natural light. The staging tool placed a compact sofa a small coffee table and wall mounted shelves. Because the photo had clear floor lines the result required only minor shadow tweaks and was ready within an hour.
Example two is an older suburban home with complex trim and uneven lighting. The tool needed manual corrections for shadows and two items were replaced to match the scale. The extra review time resulted in a more believable end product and better listing engagement.
Virtual staging tools work by combining image analysis object libraries placement rules and rendering techniques to create images that show the potential of a space. The best results come from good source photos careful review and selecting a platform whose style and turnaround match your workflow. Apply the preparation tips in this article and you will reduce rework and get images that help listings stand out.
If you manage listings try a small pilot with three to five photos before switching fully to a new service. Track metrics such as listing views days on market and inquiry rate to measure impact. Good staging can improve first impressions and shorten the sales cycle when used thoughtfully.
Ready to try virtual staging for a listing or to compare platforms for regular use take the next step and test a few sample renders. Start with photos taken under consistent light and request full resolution outputs for final review. If you need a place to start the linked roundup includes direct links to trial pages and sample galleries to speed your evaluation. Testing several options reveals which library styles and editor controls match your brand and client expectations best.